Saturday 13 August 2016

The Stereographer's Special Shots

In this blog, with the help of the stereographer, I look at one of the 'special shots' in Hugo: when the Station Master leans towards Hugo - and out of the screen.

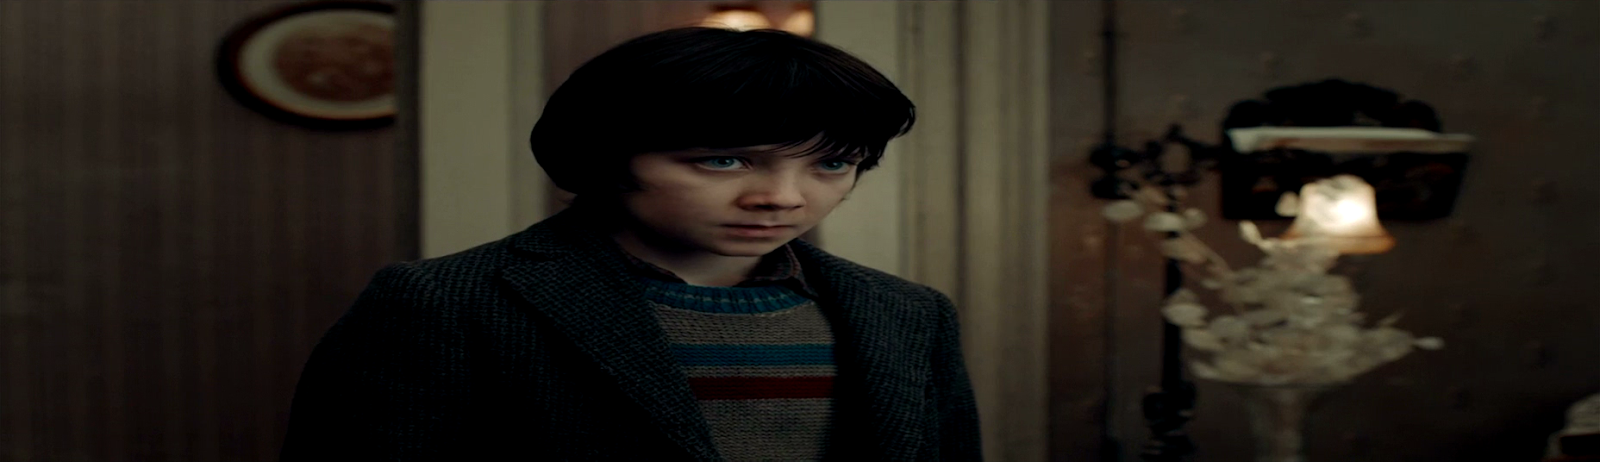
44 minutes into Hugo, Hugo and Isabelle are stopped by the Station Master (Sacha Baron Cohen). His dog barks at Hugo and this raises his suspicions. This leads to one of the 'special shots' in Hugo: a 17s18f shot where the Station Master leans towards Hugo and into the negative space (in other words out of the screen).


Sequence (left eye)

Sequence (right eye)

This confrontation is a big moment in the film. It's also a big 3D moment - the kind that makes it into the trailerI discussed this shot with Demetri Portelli, the stereographer on HugoPortelli told me how he thought that Scorsese's "aesthetic was big, fun, 1950’s-style 3D". This shot is exactly that; 3D with its roots in vaudeville sideshows. It's a time to disregard the 'rules' of 3D and have some fun instead, as Portelli told me:


Finding big 3D moments, breaking with your depth budget and offering things to the director and saying, ‘hey wouldn’t it be cool if we did that?’

Portelli explained that the cameraman first tried to do an over-the-shoulder shot on these coverages, as is the convention for 2D photography. This setup was changed following conversation with Scorsese:


Marty said, ‘no faces will come out of the screen?’ And I would say, ‘No, just the shoulder. The closest thing to you will come out of the screen.’

As well as the framing having the hallmarks of being influenced by filming in 3D, this shot is also heavily signposted as being a special shot: because the Station Master leans so slowly (it takes nearly 18s) and because the effect is so pronounced. This signposting is 3D's equivalent of breaking the fourth wall - literally.

However, it does not necessarily distract the audience from the narrative. Portelli believes that the audience has grown accustomed to the visual language of 3D filmmaking in the same way as they expect different lenses to be used at different times:


The audience has tolerated lens changes. You are used to the format, the filmmaking language where the frame changes. So too are people becoming somewhat used to the 3D.

Moreover, Portelli argues that the audience has chosen to watch the 3D version of the movie precisely because of shots such as these. In other words, the distraction caused by these special shots serves to enhance the audience's enjoyment of the film:


Right now, you just remembered you’re in a 3D movie and it was fun. Good! That’s what you pay for!

Portelli understands too that these special shots must be used sparingly and to complement the story. This shot breaks a number of the 'visual sins' which Block and McNally identify in their book 3D Storytelling. The IO (inter-ocular distance) has been ramped up and the framing means that the Station Master's hat is cropped by the frame. Also the light from the lamp in the background means that the divergence may become too pronounced. Portelli explains that this shot was a balancing act:


There’s a light behind him and it’s dangerous, you can split and become too divergent. And also Sacha’s nose, we cut out before it becomes too uncomfortable. That shot is well-framed for that duration, because he leans forward. It actually works, even though his hat is breaking the top of frame.

As detailed in my previous blogs, I am using the Depth Map Automatic Generator (DMAG) by Ugo Capeto to create data from 3D film stills. With the stills from the sequence above, we get the following depth map sequence:


Depth map sequence

As the sequence progresses, the appearance of the grey area on the right of the image (which should be background) shows how DMAG is unable to accurately create depth maps from these image pairs. This inaccuracy is evident in the waviness of the lines when I plot the maximum and minimum displacements:


The top line, in red, shows the use of negative space increases as the Station Master comes further out of the screen. Although the values are not perfect, it is interesting to see the clear progression.

Many thanks to Demetri Portelli for being so generous with his time. Animations were created using GIFMaker.me.

Sunday 24 July 2016

The Dynamic Stereoscopic Window

In this blog I identify that certain shots have a 3D effect added to them in post production and that this serves a narrative purpose.


3D Storytelling by Block and McNally.

In 2D films, the viewer does not look through a 'window' to see the image; the image is on a screen, and that screen is on the same flat surface as the 'window-frame'. In their book 3D Storytelling, Block and McNally explain this idea of 'windows' and 'frames'. 


"There's a frame that surrounds every screen. In a movie theatre it's a frame of black curtains and on a television or a computer it's the plastic case that surrounds the screen."

They go onto explain how 3D films, as one of their 'visual variables', can choose to detach the screen from the frame. This creates a 'window' called the Dynamic Stereoscopic Window:


"It can move forwards, backwards or tilt at a variety of angles ... the stereoscopic window is created and controlled in postproduction."

This effect is evident in a few shots in the sequence from Hugo that I have been analysing. When Hugo interrupts Mama Jeanne and retrieves the paper from his pocket, the left-eye image has vertical masking on its left and, conversely, the right-eye image has vertical masking on its right. This creates a Dynamic Stereoscopic Window which places the window in front of the screen.


Shot 10 left-eye image with vertical masking on its left.
Shot 10 right-eye image with vertical masking on its right.

The use here of the Dynamic Stereoscopic Window interests me for two reasons. The first is that it has been applied in post production. This means that it was a discretionary choice by the filmmakers to apply it. The second interesting point is that it has not been applied to similar shots in the same sequence. Shots 2, 4, and 6 do not have this effect applied. Shots 8 introduces this effect and it sustained in Shot 10. Shots 14, 17, 19, 21, 23, and 29 revert back to not having the effect applied.


Shot 2: no vertical masking.
Shot 4: no vertical masking.
Shot 6: no vertical masking.
Shot 8: introduces masking.
Shot 10: sustains masking.
Shot 14: reverts to no vertical masking.
Shot 17: no vertical masking.
Shot 19: no vertical masking.
Shot 21: no vertical masking.
Shot 23: no vertical masking.
Shot 27: no vertical masking.

From the stills above, we can see that this is not related to shot scale. This underlines that filmmakers are deploying the effect at their discretion; deploying the effect has not be foisted upon them by working in 3D. In summary, the filmmakers are using the Dynamic Stereo Window for a narrative purpose.


Shot 7: Mama Jeanne demands an explanation from Isabelle.

By Shot 8, when the effect is introduced, Mama Jeanne has learned that Hugo is the "thief" about whom Papa Georges has told her. Immediately preceding this shot, Mama Jeanne confronts Isabelle and demands an explanation. This pressurises Hugo, leading him, in Shot 10, to interrupt in Mama Jeanne and Isabelle by shouting at them to wait and then he passes the drawing the mechanical man has made to Mama Jeanne. In Shots 11, 12, and 13, Mama Jeanne stops and reacts thoughtfully as she opens the drawing and realises its significance. When we return to Hugo in Shot 14, when the effect is removed, the tension has been alleviated.

In this sequence, the filmmakers have placed the window in front of the screen while looking at Hugo to emphasise the tension that he is feeling. In my research, I will look further into the use of this effect. For reference, Shot 8 lasts 1.7s and Shot 10 lasts 6.8s.


Shot 40: left masking applied to right-eye only.
Shot 41: right masking applied to left-eye only.
Shot 50: similarly, right masking applied to left-eye only.

Finally, a different Dynamic Stereo Window is created twice more in the 3m14 sequence I have been analysing. Firstly in Shot 40 when Mama Jeanne reopens the door to the room with the armoire. Secondly in Shots 41 and 50, which is a surveillance-style angle. That needs a blog unto itself!

Inconsistencies with displacement within a shot

In this blog, I extend the ‘cinemetrics’ with depth data and discuss the inconsistencies with the depth maps I have generated so far.

My research will use the ‘cinemetrics’ used to perform statistical analysis of 2D films. My aim is to extend this discipline with data that is unique to 3D films: depth. As detailed in my first blog, I am using the Depth Map Automatic Generator (DMAG) by Ugo Capeto to create data from 3D film stills.


As detailed in my previous two blogs, I have collected a 48 stills (in 3D) – one from each shot within a scene. These have been catalogued and, against each, the Average Shot Length (ASL) and Shot Scale recorded. In addition, I have run each image pair through DMAG and embellished the data with the min and max displacement reported by DMAG. A copy of this catalogue may be found here.

When I came to analyse the displacements, I find that there are inconsistencies between two very similar shots. For example, here are two mid shots of Hugo which are the second and fourth shots in the scene which I am analysing:

Shot 2.

Shot 4.

Between these two shots, the min displacement (white) varies from -22.4 to -20.3; the max displacement (black) varies from 30.6 to 34.6. The first cause for this inconsistency may be the quality of the source material i.e. the image pairs. Here are the depth maps for those same two shots:

Depth map for Shot 2.

Depth map for Shot 4.

We can see that DMAG has performed quite well in isolating Hugo in the depth map. There are a couple of minor issues: an artefact produced by the lamp and, in Shot 4, the picture on the wall on the right hand side of the image. But why is Hugo nearer (darker) in Shot 4? On initial inspection, it looks as though the two shots were filmed as a single shot (with Shot 3 intercut). If this was originally a single shot, I would have expected the depth bracket to remain consistent between Shot 2 and Shot 4.

I need to investigate whether the change in depth is genuine, perhaps as a result of the slight pan to the right between the two shots as the camera follows Hugo's movement into the room. My confidence with the data will have a significant bearing on how I am to use in my analysis. It may be that I establish an acceptable margin of error.

When I came to look at the image pairs close up, I notice that they haven't been cropped perfectly. In my next blog, I will return to the themes of confidence and consistency in the depth data once this issue has been resolved.

Getting started with cinemetrics

In this blog, I continue the analysis of a scene from my previous blog where I start to capture standard ‘cinemetrics’ data.

One aspect of my research is whether editing has been influenced by the use of 3D. As a starting point I need to collect data on what Barry Salt describes as the “simplest” statistic: Average Shot Length (ASL). As detailed in my previous blog, I have captured stills from each shot within a scene, catalogued them in a spreadsheet, and have rough timings for each shot.

The cover to Film Style and Technology: History and Analysis by Barry Salt.
To get precise timings, however, I need to examine the clip frame-by-frame and this requires a video editor with a good timeline function. After an exhaustive search, I settled upon DaVinci Resolve 12.5 fromBlackmagicdesign. The free version works well for my purposes – indeed the only feature which would have been useful and is missing is the ability to grab stills directly from the Edit workspace.

The Edit workspace in DaVinci Resolve 12.5.

I worked through each shot in my catalogue to identify the precise timecode at which the shot begins. From my rough timings I know that, for example, the second shot begins around 15s. I used this as a guide to identify the thumbnail on DaVinci Resolve’s timeline where the shot changes, before using the left and right arrows on the keyboard to find the precise timecode. This process reveals the second shot began at 14:11 (i.e. 14s and 11 frames).

Each timecode was then recorded in the catalogue against each shot. This is a painstaking process, but one that is aided by having a list of shots with rough timings to work through. It is otherwise easy to miss a change of shot or to lose one’s place. I converted each timecode into a frame number (on the basis that my clip is running at 24fps). Knowing the frame number at which each shot began, I could use a simple spreadsheet formula to calculate the duration of each shot. For example, with the second shot:

Start of Second Shot: 14:11 (i.e. frame number 347).Start of Third Shot: 17:09 (i.e. frame number 417).Duration of Second Shot = 417 – 347 = 70 frames = 2.9s.


In my next blog, I will discuss how I went about extending the ‘cinemetrics’ data with depth data.

Creating stills for each shot within a scene

In this blog, I explain how to create stills for each shot within a scene – and how to manage them once you have them.

The next task was to analyse an entire scene from Hugo. I chose the scene where Hugo and Isabelle take the image drawn by the mechanical man to Mama Jeanne, which happens 55m into the film. The scene starts with Hugo and Isabelle entering the apartment and ends when Papa George arrives. This scene lasts 3m14s.

Poster from Le voyage dans la lune.
The scene represents the midpoint in the film, where mystery of the mechanical man has been solved and now our protagonists must undertake the task of revealing Papa Georges to be the famous director Georges Méliès. The scene follows a reasonably standard narrative path, where our protagonists confront Mama Jeanne with new information and are instructed not to pursue their investigations.

The reason I chose this to be my first scene for analysis is because I expected this ‘standard’ storytelling to be ‘light’ on 3D. I assumed that the filmmakers would not choose to emphasise depth in an interior scene where traditional 2D techniques may be used to successfully portray this narrative.

The mechanical man draws an image used in Le voyage dans la lune.
I analysed the scene shot-by-shot. This process required navigating the clip frame-by-frame. For ease of use, I created a clip of this specific scene; the smaller file size and shorter duration simply made it easier to navigate. It was only after much frustration working with the entire film that I realised that it would be worthwhile investing the time to create a clip!

I started by capturing stills of each shot. I did this using the Take Snapshot function in VLC. My first pass was watching the playback in real time and pressing Shift+S whenever there was a change in shot. I repeated this process, slowing the playback speed where there were rapid shot changes, until I was satisfied that I had captured one still for each shot. Having changed the VLC preferences to add the $T token to the filename, I ended up with a folder full of images with filenames such as:

vlcsnap-00_00_002016-07-22-16h16m03s905.png
vlcsnap-00_00_152016-07-22-16h16m35s445.png
vlcsnap-00_00_182016-07-22-16h16m38s389.png
etc.

The first three numbers are the timecode in the format hh_mm_ss (added by the $T token). The first benefit is that when the files are listed in the folder, the stills are in the correct chronological sequence for the scene. This 3m14s scene contains 48 shots. One soon ends up with files all over the place, so this free filing system is invaluable. The second benefit is that I have a rough guide to timecode at which each shot changes, e.g. the second shot is around 15s, the third shot is around 18s, and so on. The importance of this rough guide will be explained in my next blog.

Next, I catalogued each shot in a spreadsheet. I created a text file of the directory listing using the MS DOS command dir >text_file_of_directory_listing.txt and pasted this into the spreadsheet, as the basis of my catalogue.

Three different but similar shots.

Most of the scene involves two modes of conversation: one between Hugo and Mama Jeanne; one between Isabelle and Mama Jeanne. As such, the filmmakers have often used the technique of shot-reverse-shot. This results in a lot of shots which look very similar. To help manage these similarities images, against each row I added a short description:

vlcsnap-00_00_152016-07-22-16h16m35s445.png : "Good evening, ma'am."vlcsnap-00_00_182016-07-22-16h16m38s389.png : "Very good manners. For a thief."vlcsnap-00_00_252016-07-22-16h16m45s207.png : "I am not a  thief."

I found the easiest descriptions came from the dialogue, which I could pick up from the subtitles.

Subtitles provide a useful description for each still.


In my next blog, I will discuss how I went about capturing exact shot lengths and the successes and failures of getting depth data from my stills.

Saturday 25 June 2016

My First Depth Maps

This is the first post with details of my first foray into creating a depth map from a stereoscopic image pair from the film Hugo. This is research for use in my dissertation as part of my MA in Film Studies.

Here are the steps I have taken so far:

1. Obtained a digital copy of Hugo 3D. The 3D was in Top and Bottom (TaB) frame format in a Half Over Under (H-OU) resolution of 1920x1090 @ 24fps.

2. Created images of the frames (in PNG format) by using VLC to playback the file with the Scene Video Filter creating an image every 120 frames (i.e. every five seconds). This is an example frame:
TaB frame from Hugo 3D

3. Separated the TaB frames into image pairs using ImageMagick's convert tool:

convert *.png -crop 1856x536+16+8 +repage -set filename:f "%t_r" imagepairs\%[filename:f].png
convert *.png -crop 1856x536+16+544 +repage -set filename:f "%t_l" imagepairs\%[filename:f].png
4. Created a depth map from the image pairs using Depth Map Automatic Generator (DMAG). The example has a depth bracket from -6.8 to +1.2:

DMAG

Depth Map of the same frame

Resized to 192x109 (thereby correcting the aspect ratio)


5. Because an image of 1920x545 creates a depth map with 1,046,400 pixels, the image was resized to 192x109 (i.e. 20,928 pixels) using ImageMagick's convert tool:


convert *.png -resize 192x109! -set filename:f "%t" resized\%[filename:f].png
Get RGB

6. Converted the depth map into a array of pixel values (in a TXT file) using Imaging Technology Group's Get RGB tool. It created 20,928 rows of data:

scene17041.txt

7. This data was imported into Microsoft Excel (as a CSV file) and embellished with formulae to identify the x and y coordinates and the depth (within the defined depth bracket):

Analysis.xlsx

This data can be pivoted to allow some analysis, such as the average depth, position of foreground objects, window violations, etc. Data analysis is one of the next steps!